
The following information comes directly from this tutorial. The purpose of this post is largely an effort to rewrite/clarify. If there are any issues, please report it on Github.
This tutorial will go through the following:
- Creating an AWS EKS (Elastic Kubernetes Service) cluster
- Deploying a Kubernetes Dashboard
- Deploying a microservices demo application (maintained by Google)
- Installing the Gremlin agent as a daemon set and launching a shutdown attack with Gremlin to check cluster reliability
Pre-requisite Installations:
Tutorial Step by Step
$ eksctl create cluster
$ eksctl get clusters
Should display:

NAME	REGION
ferocious-outfit-AAAA	us-west-2
$ sudo aws2 eks --region us-west-2 update-kubeconfig --name ferocious-outfit-AAAA
Should display:

Added new context arn:aws:eks:us-west-2:11111111:cluster/ferocious-outfit-AAAA to /Users/sbd/.kube/config
- Note: For AWS CLI v2 users, if you come across the error below, you’ll need to change
command: aws to command: aws2 in the config file (e.g. /Users/username/.kube/config).
Unable to connect to the server: getting credentials: exec: exec: "aws": executable file not found in $PATH
$ kubectl apply -f https://raw.githubusercontent.com/kubernetes/heapster/master/deploy/kube-config/influxdb/heapster.yaml

$ kubectl apply -f https://raw.githubusercontent.com/kubernetes/heapster/master/deploy/kube-config/influxdb/influxdb.yaml

$ kubectl apply -f https://raw.githubusercontent.com/kubernetes/heapster/master/deploy/kube-config/rbac/heapster-rbac.yaml
Deploy Kubernetes Web UI/Dashboard
For more information, check out the AWS docs.
$ kubectl apply -f https://raw.githubusercontent.com/kubernetes/dashboard/v1.10.1/src/deploy/recommended/kubernetes-dashboard.yaml
Create an eks-admin-service-account.yaml file with the following:
apiVersion: v1
kind: ServiceAccount
metadata:
  name: eks-admin
  namespace: kube-system
---
apiVersion: rbac.authorization.k8s.io/v1beta1
kind: ClusterRoleBinding
metadata:
  name: eks-admin
roleRef:
  apiGroup: rbac.authorization.k8s.io
  kind: ClusterRole
  name: cluster-admin
subjects:
- kind: ServiceAccount
  name: eks-admin
  namespace: kube-system
Apply the service account and role binding to your cluster:
$ kubectl apply -f eks-admin-service-account.yaml
Obtain an auth token for the service account with:
$ kubectl -n kube-system describe secret $(kubectl -n kube-system get secret | grep eks-admin | awk '{print $1}')
- Should display: Starting to serve on 127.0.0.1:8001
- Note: control + C to exit
Access the Kubernetes Dashboard endpoint with:
http://localhost:8001/api/v1/namespaces/kube-system/services/https:kubernetes-dashboard:/proxy/#!/login
- Select Token > enter in auth token returned from previous step > Sign In
Microservices Demo App Deployment
$ git clone https://github.com/GoogleCloudPlatform/microservices-demo.git
$ cd microservices-demo/
$ kubectl apply -f ./release/kubernetes-manifests.yaml
$ kubectl get pods
Once all pods have a Running status then continue with:
$ kubectl get svc frontend-external -o wide
Under External-IP, you should see a similar URL, which you’ll visit in your browser.
aaaaaa-aaaaaaaaaaa.us-west-2.elb.amazonaws.com
Connect Gremlin to your Kubernetes cluster with Helm
- To access your Gremlin certificates:
- From the Gremlin Dashboard
- Under Company Settings > Teams tab > select your Team > Configuration tab > Certificates > Download
- FYI: Zip file will contain both private and public keys. Rename the certificate and key files to gremlin.cert and gremlin.key, respectively
$ kubectl create secret generic gremlin-team-cert \
> \--namespace=gremlin  \
> \--from-file=/Users/username/Documents/certificate/gremlin.cert \
> \--from-file=/Users/username/Documents/certificate/gremlin.key
- Set Gremlin environment variables:
- To find your Gremlin Team ID: Under Company Settings > Teams tab > select your Team > Configuration tab > Team ID
- FYI: the cluster ID can be set to anything
$ export GREMLIN_TEAM_ID="replace-text-aaaaaa-aaaaaa"
$ export GREMLIN_CLUSTER_ID="replace-text"
- Add Helm to your repo and upload the chart to Kubernetes:
$ helm repo add gremlin https://helm.gremlin.com
$ helm install gremlin/gremlin \
> \--namespace gremlin \
> \--generate-name \
> \--set gremlin.teamID=$GREMLIN_TEAM_ID \
> \--set gremlin.clusterID=$GREMLIN_CLUSTER_ID
Gremlin Dashboard
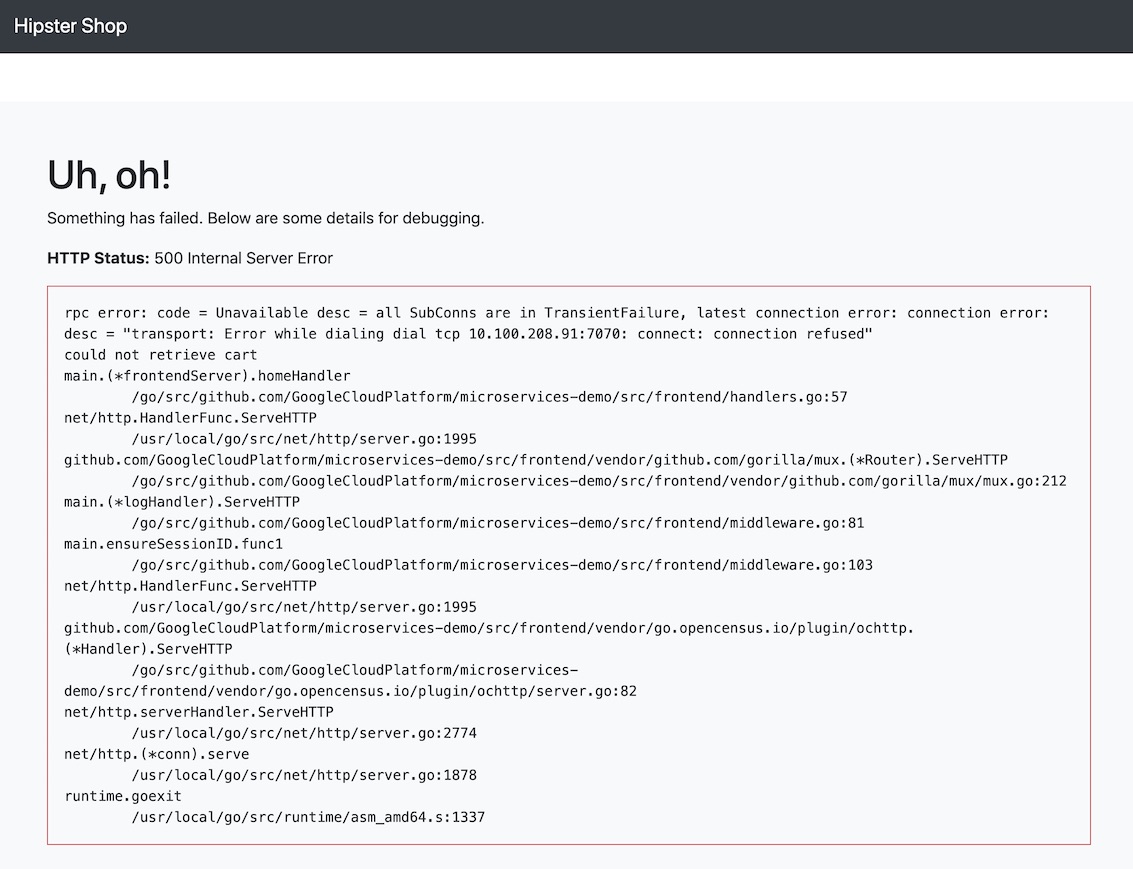
- The final steps of the process involves launching a shutdown attack to test the microservices demo app (Hipster Shop) and the EKS clusters’ reliability.
- Go to your Gremlin account’s dashboard > select New Attack:
- Under
What do you want to attack > select Kubernetes
- Under
Choose objects to target:
- Choose a cluster: select the custom cluster ID you made when declaring environment variables previously
- Choose a namespace: default
- Under the Deployments dropdown > select cartservice
- Under
Choose a Gremlin:
- Category: State
- Attacks: Shutdown
- Select Unleash Gremlin
- Refresh
http://{CUSTOM_URL}.us-west-2.elb.amazonaws.com/ in your browser and you should see 500 Internal Server Error.
Kubernetes Logs
While the server is running, head back to:
http://localhost:8001/api/v1/namespaces/kube-system/services/https:kubernetes-dashboard:/proxy/#!/login
Navigate to Cluster > Nodes > select the node which contains the cartservice pod > from the cartservice row, note the Restarts figure.
Teardown
Now that the tutorial is completed, we need to delete the cluster.
List all the services running in the cluster with:
$ kubectl get svc --all-namespaces
Firstly, delete any service(s) associated with an EXTERNAL-IP value:
$ kubectl delete svc frontend-external
Note: If services in your cluster are associated with a load balancer, delete the services before deleting the cluster so that the load balancers are deleted properly. Else, you’ll have remaining resources in your VPC, which will prevent VPC deletion.
$ eksctl delete cluster --name ferocious-outfit-AAAA
Troubleshooting
If you encounter any issues, please report it on Github.
$ aws2 sts get-caller-identity
$ aws-iam-authenticator token -i environment_name.region.environment_type
$ aws2 eks list-clusters
$ kubectl get svc --all-namespaces
$ helm version
$ helm help
$ helm install